How to Download Windows 10 on Usb From Mac
It's adequately easy to create bootable USB installation media for Windows 10 when using Microsoft's Media cosmos tool. Unfortunately this tool is not available for macOS. This mail service explains y'all how to practise this without using a Windows-based PC or VM and without using BootCamp assistant. This can come in handy when trying to install Windows on your mac or when there is just only an Apple Mac bachelor and you lot demand to boot the Windows installer for diverse reasons.
YouTube Video
If you are interested, I also created a YouTube video from this blogpost. If you prefer classic text, you can just follow the rest of this commodity:
Introduction
Unfortunately, since some fourth dimension, it became a bit more complicated to create this USB drive from macOS. The main reason for this is because macOS supports only FAT32 as filesystem that is compatible with Windows (and ExFat simply that causes problems to boot from). FAT32 has a file size limit of 4GB while the installation ISO at present contains one file that is larger.
To overcome this, we volition need to employ a tool, Wimlib, which is able to split this file in two parts. More nigh this subsequently.
Create bootable Windows 11 installation USB
In case you're looking for the instructions to create a bootable USB bulldoze to install Windows 11 instead, take a look at the following commodity: https://jensd.be/1740/windows/create-a-bootable-windows-11-installation-usb-on-macos
Download the Windows 10 ISO
Let's beginning by downloading the ISO from Microsoft. This can be washed from: https://www.microsoft.com/en-us/software-download/Windows10ISO. When you open up this link on macOS, information technology should show you the power to download the ISO rather than the Media Cosmos tool, which is shown when opening the aforementioned on a Windows-based PC.
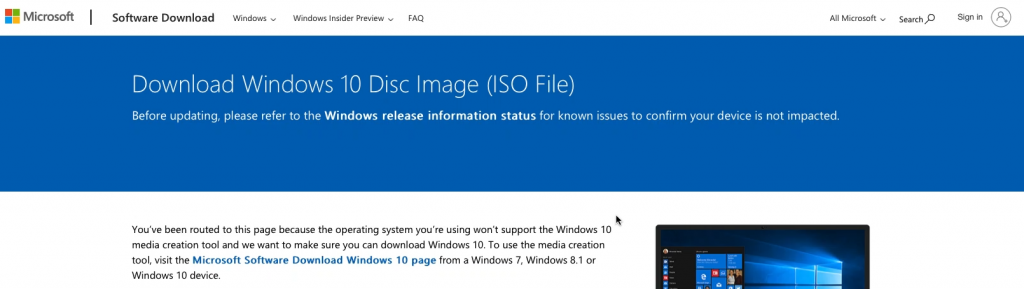
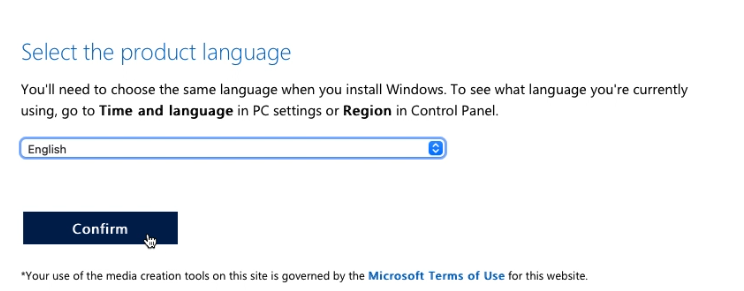
Choose for Windows 10, and so select the preferred language, go for the "64-bit Download" and await for the download to complete to get the .iso file on your Mac:
Ready the USB bulldoze
While the ISO is downloading, we tin prepare our USB drive. Y'all will need one that is at to the lowest degree 8GB. Insert the bulldoze in your Mac and kickoff Deejay Utility.
In Disk Utility, choose to show all devices:
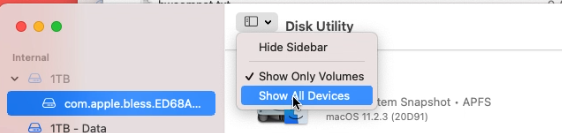
So, on the left side, select your USB drive from the list and click Erase on the top right menu. In the dialog, enter a name for the drive (WINUSB here), choose to format equally "MS-DOS (Fat)" and "Master Kicking Record" every bit scheme. Finally click "Erase" to complete the procedure.

Copy all smaller files to the USB drive
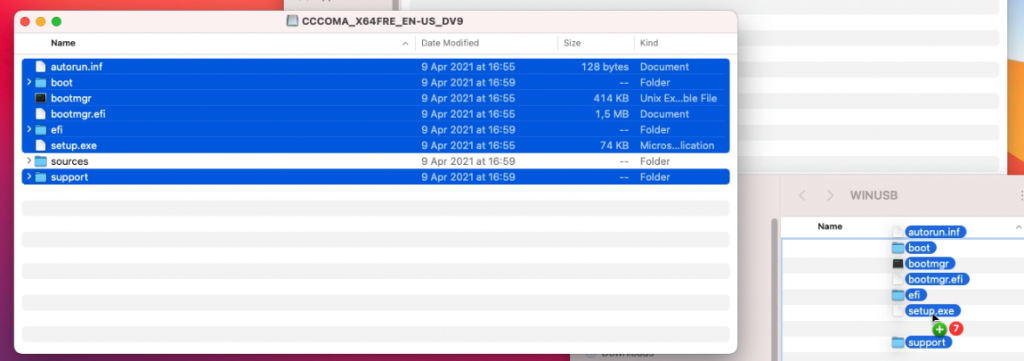
After the previous footstep, our USB drive is prepared. One time the ISO file is download besides, double click the ISO file to mount it. Then open information technology in Finder. Equally y'all can see, the sources binder contains ane big file: install.wim which is over 4GB and will not fit on the FAT32-formatted USB drive:
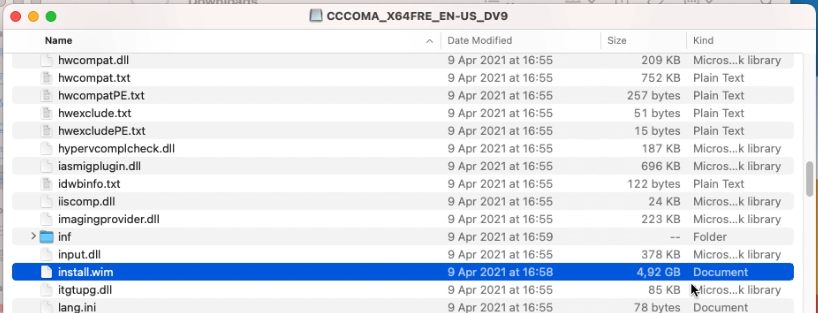
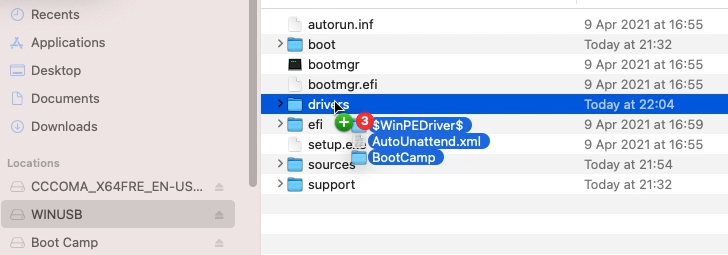
Nosotros will take intendance of that later so for now, re-create all remaining files to the USB drive using Finder.
I typically start by copying all separate files and folders, except for the sources binder:
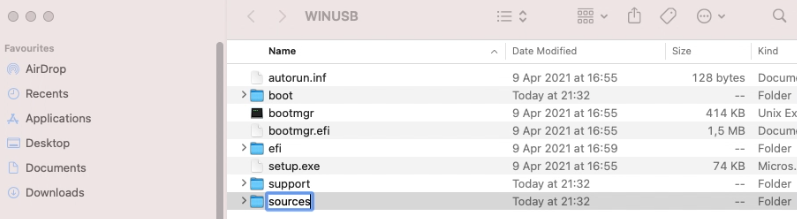
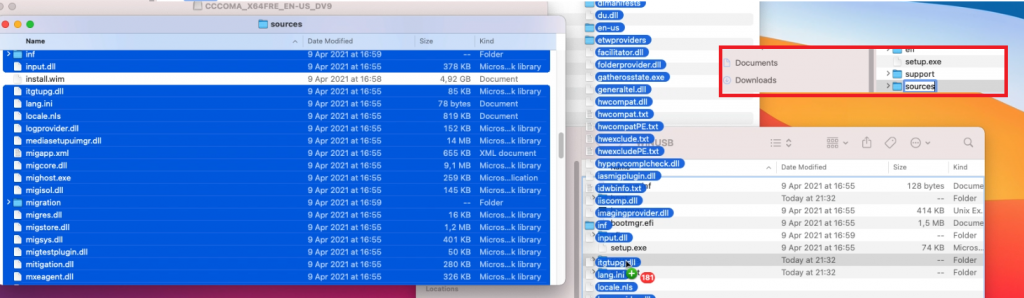
And so I create the sources folder and re-create all files from sources with the exception of install.wim:
Prepare to split install.wim
So far things were pretty straightforward and if it wouldn't be for that large file it would be a piece of block. Unfortunately we have to work around that by splitting the file in two parts, smaller than the limit of our file system on the USB drive.
To reach this, we can use Wimlib (https://wimlib.net/). This is a tool that is developed to work with, and modify, .wim files. The easiest style to get this installed on your Mac is by using Brew (https://brew.sh/).
So, as but mentioned, we start past installing Brew. As is instructed on the Mash website, copy and paste the mentioned line in a last and execute information technology.
user@users-iMac ~ % /bin/fustigate -c "$(curl -fsSL https://raw.githubusercontent.com/Homebrew/install/Caput/install.sh)" ==> Checking forsudoadmission (which may request your password). Password: ==> This script will install: /usr/local/bin/brew /usr/local/share/doc/homebrew ... ==> Side by side steps: Runmash aidto get started Farther documentation: https://docs.brew.sh user@users-iMac ~ %
Once Brew is installed, we tin can use it to install Wimlib:
user@users-iMac ~ % brew install wimlib ==> Downloading https://ghcr.io/v2/homebrew/cadre/openssl/1.1/manifests/1.one.1k ... ==> Installing wimlib ==> Pouring wimlib--i.13.iv.big_sur.bottle.tar.gz 🍺 /usr/local/Cellar/wimlib/1.13.4: 65 files, two.7MB user@users-iMac ~ %
Split install.wim and get information technology on the USB drive
Now that we have Wimlib installed, we can utilise it to split the large install.wim file and copy it to our USB bulldoze. In the same or a new Concluding session, execute the following:
user@users-iMac ~ % wimlib-imagex carve up /Volumes/CCCOMA_X64FRE_EN-GB_DV9/sources/install.wim /Volumes/WINUSB/sources/install.swm 4000 Splitting WIM: 4654 MiB of 4654 MiB (100%) written, part 2 of two Finished splitting "/Volumes/CCCOMA_X64FRE_EN-GB_DV9/sources/install.wim"
In the command in a higher place, we told to execute the wimlib-imagex tool (function of Wimlib) and passed some arguments:
- "split" to betoken that nosotros want to split this larger file
- "/Volumes/CCCOMA_X64FRE_EN-GB_DV9/sources/install.wim" which is the source file to split. Proceed in mind that the proper name under /Volumes depends on the ISO name and then you lot need to arrange this accordingly. Just do ls /Volumes from the terminal to see what is there.
- "/Volumes/WINUSB/sources/install.swm" the destination of where the split files should stop. As with the ISO name, here WINUSB is the volume characterization I gave to my USB bulldoze when erasing information technology with Disk Utility. Conform this likewise when you chose something different earlier.
- 4000 the max. size of the destination file, so the file will be split in a part of 4000MB and the rest.
Afterwards this command completes, you can encounter that now two files were created on the USB drive:

The Windows 10 installer knows how to deal with these and will simply work fine.
That should be all you need to create a bootable USB drive for Windows ten installation.
(Optionally) download Windows ten drivers for your Mac
If you programme to use the USB drive, which you created with the above steps, on a regular PC so you can skip this step. If y'all, on the other hand, plan to use this for installation on a Mac, it is a adept thought to go through these additional steps.
The goal of this is to fetch the necessary drivers for use on Mac. Equally I did from Windows in a previous article, I will utilize Brigadier for this. Brigadier, which is basically a script, works just from macOS straight as well.
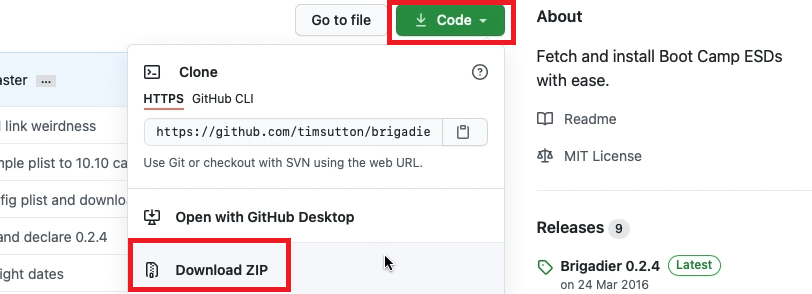
From the writer'southward Github folio: https://github.com/timsutton/brigadier, click the green Lawmaking button then choose to "Download ZIP"
Once the file is downloaded, open up a fresh Terminal session and navigate to the "brigadier-master" in your Downloads binder, then simply execute it using ./brigadier:
user@user-iMac ~ % cd Downloads/brigadier-chief user@user-iMac brigadier-main % ./brigadier Using Mac model: iMac13,one ... Expanding apartment package... Extracting Payload... Extracted to /Users/user/Downloads/brigadier-principal/BootCamp-041-84821/WindowsSupport.dmg user@user-iMac brigadier-master %
Every bit you can see in the output, executing brigadier automatically detected the model identifier of the mac which we executed this on. If you want to download the required drivers for another model, you tin can simply laissez passer it using the –model parameter. The files got downloaded as a subfolder of brigadier-main as WindowsSupport.dmg
All that is left to practise is to navigate to the binder using Finder, and then to open up WindowsSupport.dmg to mountain it and to copy those files to the USB drive:
Subsequently going through the installation, executing BootCamp/setup.exe will install most of the required drivers or at least plenty to go along the residue of the driver installation using Windows update.
Boot from the USB drive
As the terminal step, now that the USB bulldoze is prepared, with or without additional drivers for your Mac, you can boot from it.
On a regular PC, this is usually done past pressing a key at BIOS time to bring up a kicking menu (F11 is often used for this) or, for some older BIOS, past changing the boot order from the BIOS setup.
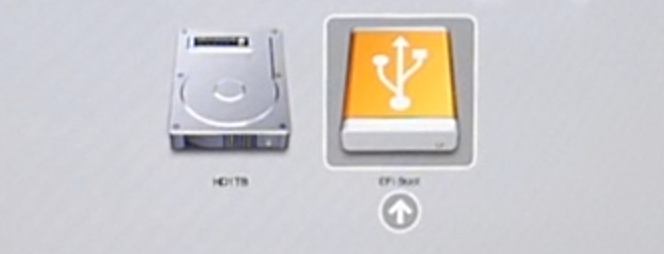
On a Mac, you tin can cull to boot from USB by belongings down the Alt key on boot and to select the USB bulldoze from the boot loader:
How to Download Windows 10 on Usb From Mac
Posted by: eidsondesten45.blogspot.com